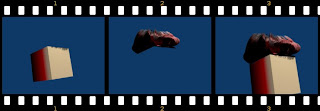
I've made a simple PDF tutorial for using the new Jahka particle system in Blender.
The previous .EXE tutorial I made and provided before on this site was Ok-ish but this new one is far better!
The file size is about 650kb and deals with making basic hair material, emitting hair particles and then rendering layers so that you can render the mesh model and the particles seperately and then composite them later in Blender's sequencer.
Also, this tutorial is based on the latest version of the particle system as used in the Blender 2.45 SVN AAO build available on www.graphicall.org
You can download the PDF tutorial here
http://www.mediafire.com/?cjdnjllzotz
Any questions or comments leave 'em on the site.
Shane
Edit 23/Jan/2008: This is a newer version of the PDF Tutorial provided in a compressed .Rar format. It includes more detail and tips.
Edit 03/Feb/2008: OK, here's something I just realised whilst testing the latest Blender SVn Build from www.graphicall.org.http://www.mediafire.com/?cjdnjllzotz
Any questions or comments leave 'em on the site.
Shane
Edit 23/Jan/2008: This is a newer version of the PDF Tutorial provided in a compressed .Rar format. It includes more detail and tips.
In a note at the end of the rendering section of my "10 Minute Blender Particle Hair Tutorial" PDF file, I wrote this:
"You might have a few problems when moving from rendering one layer to another.
For example, during my tests when I'd finished rendering the Mesh only shot and moved on to do the
Hair only, the wrong shot would render. The only way to rectify this was by restarting Blender and
rendering the Hair shot again seperately. A strange bug - probably."
Well, ignore that statement! The solution to this is very simple and I have given myself a slap for not figuring it out sooner.
All you have to do is this:
Instead of selecting the "Single" button in the Render Tab (in order to only render the selected render layer) - don't select it at all.
Just make sure that you click the little correction marker beside your layer name to "disable/enable this Render Layer".
Of course, make sure you only choose the layer(s) you want to render in that particular pass.
That's it. Simple really.
Check it out by doing a quick test by rendering "mesh only" first. Then in render window press J key to view other buffer. Now select a "hair only" render pass and press F12 to render. When this is done, press J key in the render window to compare the two shots by toggling between them.
Now you shouldn't have any problems.
Shane
www.dwarfedfilms.blogspot.com
1 comment:
awesome tutorial, very complete. I sent a link to a friend as well.
thanks a lot!!
-gat
Post a Comment